Happy fall, gardeners! For me, we’ve reached that time of year when it’s hard not to look around and start to mourn the last days of summer’s bounty – red-ripe tomatoes, peppers, and cucumbers galore. Come September I usually whip myself into a little frenzy trying to preserve all the harvest I can before the winter frost hits.
Of all the methods to preserve your harvest, I find pickling and canning in hot water baths to be the simplest, most fool-proof, and most conducive way to save my favorite crops.
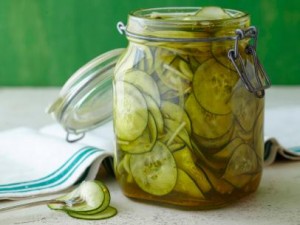
Preserve Your Harvest– Fridge Pickles
These days it really seems you can pickle anything. Jalapeños, summer squash, carrots, onions, strawberries (GREEN strawberries! Seen those?). The list of things you can pickle from your garden extends to just about anything. I’m excited about all of these things, but I have to wonder, what ever happened to the good old cucumber? Last year I wrote a post about how to grow cucumbers, and this season at Petaluma Bounty we followed these same tips in order to grow mountains of refreshing lemon, Armenian, and small green English cucumbers.
The basic idea behind pickling is adding in some vinegar with whatever your main item is, tossing in your other favorite flavors, and sticking them in the fridge for about a week. Some of my favorite additions to pickles are dill seed, coriander, garlic, and peppercorns.
Here are some super-simple picking recipes for both sweet and sour pickles. They won’t disappoint!

Preserve Your Harvest- Bread & Butter Pickles
What You’ll Need:
- 1/2 onion, thinly sliced
- 2 medium cucumbers, thinly sliced
- 1 cup water
- 1 cup cider vinegar
- 1 1/2 cups sugar
- Pinch kosher salt
- 1/2 teaspoon mustard seeds
- 1/2 teaspoon turmeric
- 1/2 teaspoon celery seeds
- 1/2 teaspoon pickling spice
How to Pickle:
- Combine onion and cucumber slices in a clean spring-top jar.
- Combine the remaining ingredients in a non-reactive saucepan and bring to a boil. Simmer for 4 full minutes to wake up the flavors of the spices.
- Slowly pour the hot pickling liquid over the onion and cucumber slice, completely filling the jar. Allow the pickles to cool to room temperature before topping off with any remaining pickling liquid. Refrigerate.
- Refrigerate the pickles for about 5-7 days to ripen. They will keep for about 2 months in the refrigerator.
Preserve Your Harvest- Mild Sour Pickles
What You’ll Need:
- 1/2 onion, thinly sliced
- 2 medium cucumbers, thinly sliced
- 1 cup water
- 1 cup cider vinegar
- 1/2 cup champagne vinegar (white wine vinegar will work just as well)
- 1/2 cup sugar
- 2 tablespoons plus 2 teaspoons kosher salt
- 1 teaspoon mustard seeds
- 1/4 teaspoon ground turmeric
- 1 teaspoon celery seeds
- 1 teaspoon pickling spice
- 4 whole garlic cloves, smashed
How to Pickle:
Follow the same method as described above, just add the garlic cloves to your jar at the same time as the cucumbers and onions.
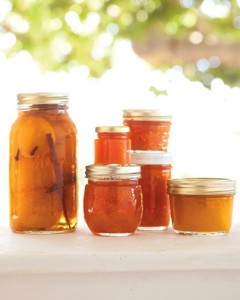
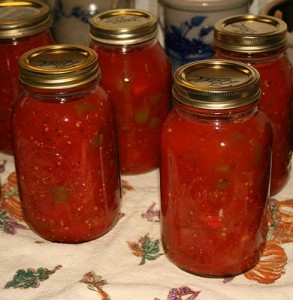
Preserve Your Harvest– Canning Hot Water Bath
This method works wonderfully for many of the fruits and vegetables we talk about here on the blog. It’s great for high-acid foods such as many fruits, tomatoes, pickles (that you want to preserve for longer than fridge pickles), chutneys, and vinegars. Acid is the key to safely preserving food – so in many cases where the main crop doesn’t contain enough acid, adding in an appropriate amount of lemon juice will help ensure that all bacteria and harmful microbes won’t survive the process.
What You’ll Need:
- If you’re new to canning, always start with a good recipe. You don’t want to mess around.
- A big sauce pot with a lid.
- A rack for the bottom of the pan OR a dishtowel OR lots of butter knives.
- Jars with lids (the jars can be old, the lids need to be new).
- A wooden spoon, and a ladle and a funnel are useful.

How To Can:
- Wash your jars and lids, well!
- Warm up your jars, either by sticking them in a warm oven until ready to use, or by sitting them in hot water. We all know what can happen when you shock a glass by pouring hot liquid in it. Cracking disasters.
- Fill your pot about ½- ¾ full with water and boil. Keep it boiling or at least simmering while you get ready to can.
- You don’t want your glass jars to sit right on the bottom of the hot pot, so line the bottom of the pot either with your rack, a dish towel (this can be unwieldy) or by dropping butter knives on the bottom of the pot.
- Make your jam, sauce, whatever it is. Here are some of my favorite recipes.
- Fill your jars by first emptying any lingering water and then pour in your delicious homemade jam or preserve. Leave about ¼- ½ space at the top of the jar, and use a rubber spatula or a butter knife to remove any air bubbles from inside the jar. Have a hot, clean towel on hand to wipe the rim of the jar and make sure it’s clean and free of spilled ingredients.
- Put the lids on, and adjust rim until it’s just barely tight – no need to fully secure it yet.
- Carefully place your jars in the pot and put a lid on – make sure there are a couple of inches of water on top of them.
- Boil or ‘process’ the jars in the pot for as long as the recipe calls for. When they’re done, turn off the heat and remove the lid from the pot, but let the jars sit there for another few minutes.
- Carefully use tongs to remove the jars and place them somewhere where they won’t be moved for a day or so. Within the next day (and maybe within hours), the lids will seal, making a ‘popping’ sound. This is a good thing! If within 24 hours the lids have not sealed don’t store the canned good. You know it sealed correctly if center of the lid doesn’t move up and down when you press on it. If it didn’t seal properly, the shelf life of your jar will not last past about a week. So stick it in the fridge, enjoy some leftovers, and try again next time.

Viola! Your delicious canned foods should last for about a year. If the end of the year arrives and you still have many on hand, do as I do and frantically gift them!
What are some of your favorite recipes to preserve your harvest?


 Family

