It’s Easier Than You Think to Grow Kale in Sonoma.
In our climate, there are some spectacular crops that you can grow almost all year round. Kale is one of my favorites from that list. At Petaluma Bounty we would grow kale in three or four successions throughout the year – one would go in the ground around May 1st, then another in July, a third in October, and maybe one tucked in the ground under cover for the winter.
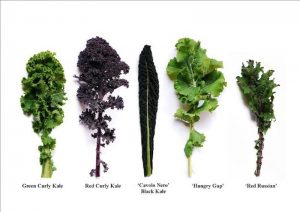
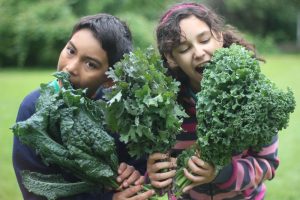
I’m personally partial to Lacinato and Dino varieties of kale, but also love Red Russian and some of the curly varieties out there. Any of these will pack a nutritional punch, but by all means, grow your favorites! Kale is rich in omega-3 fatty acids, vitamins B, A, C and K, fiber, and contains nearly 3 grams of protein per cup. Eaten raw or cooked, there are countless ways to incorporate more kale into your diet and there are a couple nice recipes for you to try at the end of this post.
Follow these four simple steps and you’ll be roll’n in kale before you know it.
Step 1: Sow Your Seeds.
You can start and grow kale seeds in a greenhouse, windowsill, you name it. Check out our handy seed starting guide that will lead you all the way through, step-by-step. If you are ready to get into the garden to get busy, or just don’t want to take the time to start your own seeds this year, you can pick up a couple of different varieties from your local nursery and proceed to step 2.
Step 2: Prepare Your Soil.
If you’re a regular reader, you’ll know I’ve written before about the importance of soil preparation, and this is always worth thinking about when transplanting. Begin by adding in a layer of compost that is anywhere from one to three inches thick, depending on how much help you think your soil needs (here’s link that discusses the importance of soil testing that might help if you’re unsure). Kale shouldn’t need too much added nutrition, but it’s always good practice to amend your soil a bit before a new planting. I sometimes come through the garden and spray a blend of fish/kelp solution on the leaves themselves or as a root drench if the plants look like they need a little added nutrition during the growing cycle.
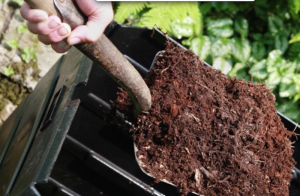
After you’ve evenly spread compost over the top of your bed or box, work it into the top 6 inches of soil with a fork or trowel. This also gives you an opportunity to break up any huge clods that have formed or, in the case of my heavy adobe clay soil, any rock-like balls of soil that have formed over the winter. You want to break all of these up into a nice tilth.
You can grow kale in the ground, raised beds, or even in pots – it’s versatile and fairly adaptable. Plan to leave about 1 foot of space between most kale plants.
Step 3: Transplant Your Kale.
Now that your soil is ready, it’s time to transplant. It’s best to do any transplanting in the early morning or late evening, or on a cool, overcast day. No crops will thrive when their fragile roots are exposed to the elements, but greens are especially sensitive.
For best results when transplanting, it’s a great idea to give that area of your garden, window box or field a little water a few days prior. This is referred to as “pre-irrigating” and ensures that your soil is moist and ready to host new plants.
Use a trowel, butter knife or simply your hand to dig a little hole in the soil, plop the transplant in, and cover up the the base of the plant. There’s no need to use much force in this process, just make sure to give the transplant a little push down to settle it in.
Step 4: Water Your Kale.
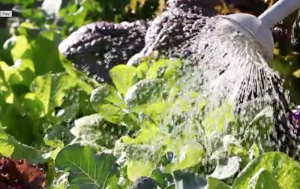
Give your plants a good watering right after planting, and then come back every few days with your hose or watering can and give them a deep soaking. Once they start getting bigger, say after a few weeks, they’ll need less frequent, deeper watering. Depending on your soil type, this may mean two or four times per week.
Harvest Time!
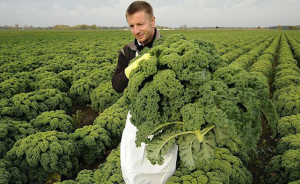
One of the great things about growing kale is that you can start harvesting it almost weeks after planting if you want some baby leaves. A good rule of thumb is to just harvest a few leaves at a time in order to keep the plant growing and photosynthesizing. Snap off the biggest, outermost leaves from the outside and keep the small center leaves intact. As the plant gets bigger, you don’t have to worry as much about over-harvesting. Enjoy!
Let’s Eat.
Here’s a couple of links to recipes for kale dishes – we hope you like them. And by all means, share your favorite with us too!
10 Best Kale Recipes from thedish.plated.com
Dino Kale Recipe from trycaviar.com
Harvest to Table Blog – Written by local chef/gardener Steve Albert
Next time on the blog we’ll be chatting with my friend Hedda Brorstrom of Full Bloom Flower Farm about all things herbs – growing, use in everyday life, and making healing medicines.
 Family