How to Grow Food During Winter
It hurts me to have to go out and buy produce instead of growing it myself. While it does mean that I get to go check out the farmers markets, support fellow farmers, and bring home crops that are new and unusual to me, it’s hard to swallow the fact that the main farming season is over.
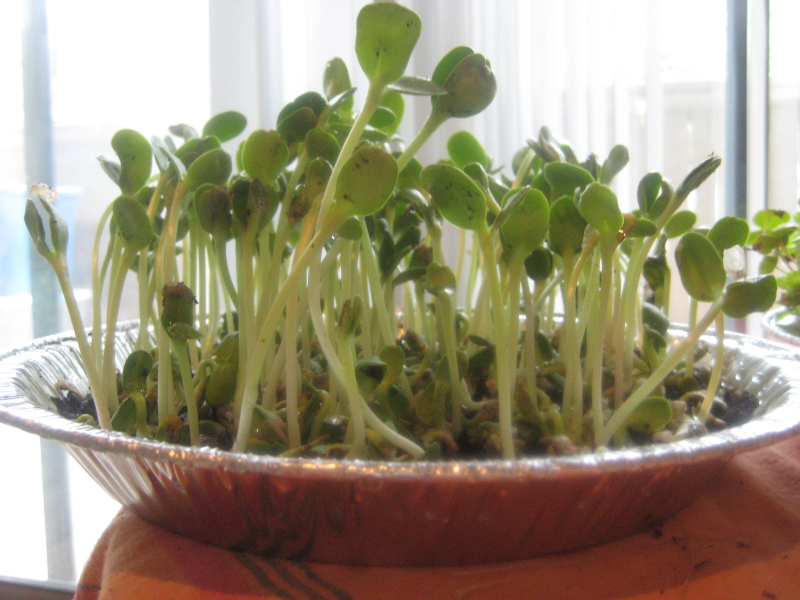
Well, let me share with you a few easy ways to grow food during winter here in Sonoma County. From extending the growing season outdoors to growing smaller plants inside, the options are many. I’m even thinking of building a windowsill garden display like this as a New Year’s gift for friends.
Maintain Your Outdoor Garden
Many of my fall crops are still looking great and healthy outside in the fields, which tells me I can keep eating from them into early spring or until they display signs that they’ve finally had it. When my hearty crops are nearing their end in winter, they display a few telltale signs: browning of leaves, the arrival of aphids, and general wilting and decline.
As you know, we have a funny little climate here in Sonoma County, which varies one winter to the next. This year’s more temperate weather may well lead to kale, chard and broccoli plants that thrive outside well into early spring, as long as they were planted early enough in the fall to have established strong, deep roots. The plants may not display signs of active growth during the winter, but the cold winter ground acts more as a pantry from which you can harvest leaves, a few at a time, until the plant finally kicks the bucket.
One smart way to ensure a longer life for these hardy plants is to invest in some heavy row cover such as agribon or remay, which you can find online or at your local garden supply store. You can drape it right over your plants or find a way to prop it up on PVC or wire hoops. Or better yet, construct a low-tunnel greenhouse like we discussed last week! All of these quick easy methods will help you continue to grow food during winter seasons.
Grow Food During Winter With Indoor Trays
This method is a perfect solution for growing fast, tasty, nutrient-rich microgreens and other quick crops that are able to grow inside in trays during the winter. As long as they sit on a windowsill or somewhere that receives as much light as possible during these dark winter days you should be able to have a continuous supply of microgreens for salads, juices, sandwiches, and more.
The trick for picking out the best crops to grow indoors with trays is to think about which crops are shallow-rooted, don’t require too much heat, and will be tasty when still small. My favorites, based on these criteria, are spicy Asian greens, arugula, lettuce, and kale.
The best way to get started with windowsill crops is to first find some containers that will fit nicely on your windowsill or in other sunny spots inside your home. Maybe I’m not the most objective of home decorators, but I find that trays of greens make lovely focal points for the home, giving even urban apartments that ‘farm chic’ feel.
You’ll want your trays, pots or boxes to be about 4 – 8 inches deep. You can fill them with your choice of potting soil – bought from your local garden supply store or made with a mixture of soil from your garden, some perlite or sand, and some finished compost if you have it. You can buy small transplants or sow seeds directly into the soil mix – making sure to water one or two times a day to keep the soil surface moist until the seeds germinate. After that you can hold off and only water once a day.
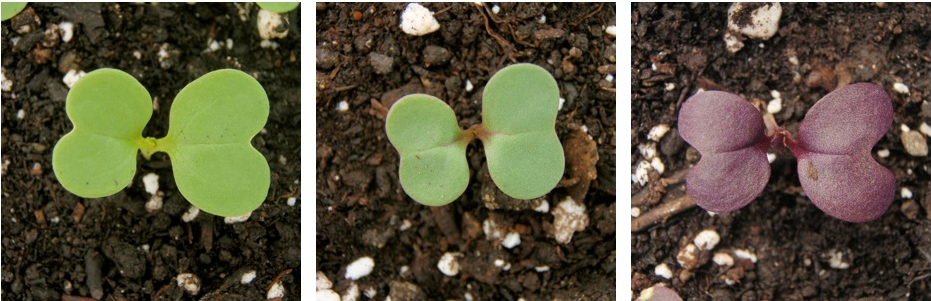
As your greens grow, continue to water them about once a day or whenever the soil feels dry to the touch. Your greens will be ready to harvest when there are two or three sets of ‘true leaves’ – not to be confused with the ‘seed leaves’ or cotyledons – which represent the first real growth following a green sprout after the seed germinates.
To harvest your greens, use a pair of sharp scissors to cut as much as you care to eat, leaving about an inch of plant to keep growing in the pot. The greens should take a few weeks to a month to grow back into salad-ready size. Repeat the whole process 2 – 3 times or until the greens start to be too spicy for comfort. At that point, add some new potting soil to refresh the pot, and start the whole process over!
With luck, we’ll all be eating home-grown greens all winter long. In my next post, I’ll share tips on how to plan for the 2015 growing season and share some gardening resolutions for the new year.
 Family