Why You Should Build a Raised Berm For Woody Shrubs
Most farmers start their operations on short-term land leases. I’m no exception, and for the first few years of B-Side Farm I grew mostly annual flowers because I wasn’t sure how long I could farm at each location. Annual flower (and vegetable) seeds tend to be fairly cheap compared to larger bulbs and potted plants, so there was no fear in spending the money on something that would grow and die in one season.
Last year I finally got a long-term land lease and suddenly faced the same exciting opportunities (but also the same challenges) that many of you homeowners face. I could suddenly plant anything! I could actually invest in shrubs and roses and peonies and not worry that I’d have to dig them up and move them any time in the foreseeable future.
So I jumped in. Two long rows of peonies, three of roses, and a border on one end of the field for some large woody shrubs that would grow lots of great foliage I could use in my floral design. It was this border that proved to be pretty problematic in the end, for as much as I talk about the importance of soil prep, I’m sometimes hasty and don’t take as much care as I should. It came back to bite me this year.
My Mistake: I Didn’t Think About Drainage
 The area where I was planting the shrubs is a funny corner of the field, almost triangle-shaped. I couldn’t figure out how to best lay out the plantings I had in mind, so I opted for rows about 5-feet apart, running down the length of the longest arm of the triangle.
This ground had never been worked so in the spring we brought in a tractor to disc it (along with the rest of the field). I incorporated compost and amendments according to the instructions from my soil test. Then I just let it become a jungle of weeds over the summer, as I focused my energy on the main rows of annual flowers in the field.
Come late fall, I weeded and then dug large holes for all of my woody plants. They say to dig holes twice as deep and wide as what you’re planting (and that your plant’s root ball will often never extend past this space). That’s what I did, and the plants (mostly viburnum, abelia, and hydrangeas) seemed happy in their new home.
Then It Started Raining
And it didn’t stop. All winter long. My woodies weren’t so happy, and throughout the winter some managed to just hang on by a thread, while others just disappeared altogether – rotting into the ground.
When the ground finally started to dry out and air temps started to climb in early spring, I held out some hope for my little shrubs. I figured that maybe they would take off growing once the soil warmed up. But, wish as I might, they just sat there and I had to come to terms with the fact that they weren’t going to thrive if I just left them be. All the heavy rains had compacted the soil to such an extent that it was almost impenetrable with a digging fork or shovel. This was no environment for my plants’ roots who were crying out for air space to make their way deep into the soil.
Starting Over

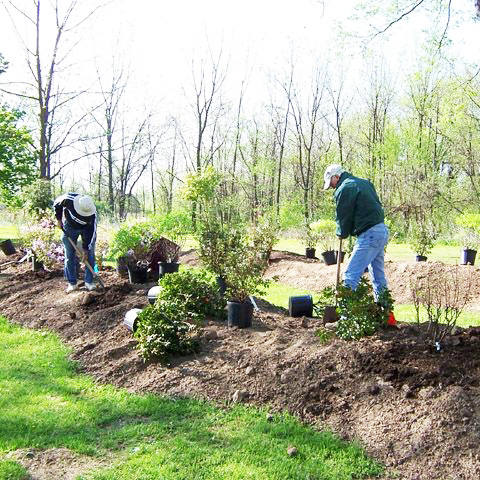
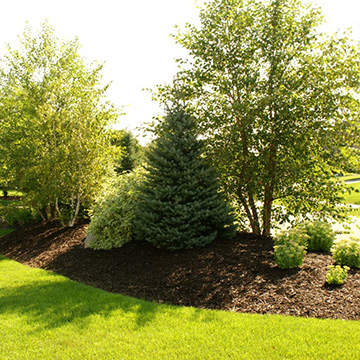
As soon as the soil dried out enough to dig, I decided to get in there and started the whole process over. I dug up any of the shrubs that had made it through the winter, potted them up for the time being, and got to work building a berm that would be the new home to my plants. A berm can take many shapes and sizes, but in essence it’s just a raised mound of earth. There are many uses or berms but this issue of providing good drainage is a big one. They’re also useful for providing interest to the landscape, changing the flow of water through the property, or even blocking sound from the street or neighbors. Check out my blog post about planting blueberries to read about another crop that will benefit from berm planting – as blueberries don’t like wet feet.
I just finally finished the berm project and it was pretty simple. I loosed a 3’ wide band of soil with a broad fork, and then started mounding up soil from the surrounding area, essentially digging small trenches on either side of the berm. I added a bunch of compost then shaped it with a rake until it was relatively flat on top, and voila! Digging my new holes atop the berm was almost effortless with such loose soil. After re-planting all my shrubs, I’ll cover the whole thing with wood chips and be done with it.
For building bigger or wider berms, it’s a good idea to bring in extra top soil, sand, or other special materials to give the land some lift. Here’s a great article on the topic, and you can refer to this odd but helpful video for further information.
Wish me luck with my new shrub border, high atop the berm!


 Family

