How to Start Seeds This Spring
Spring has about sprung, and it’s that time of year to start seeds in the greenhouse (or windowsill!). In fact for some crops, we’re already deep into seed sowing season. I’m talking about the dusty miller, eucalyptus, foxglove, and lisianthus seed trays that are just sitting in my greenhouse, not really doing much of anything. But they’re growing because I took care to sow them properly and will continue to baby them along until they’re ready for plant-out in May.
So now it’s time to start the next round of seeds in the greenhouse: the peppers, tomatoes and eggplants, herbs, and onions – all of which take longer than many greens we’ll start weeks from now. For all the Garden Club members here’s my tried and true guide for how to start seeds in trays in the greenhouse, kitchen, porch, or whatever space you have to work with at home.
Step 1: Select your seeds
I’ve talked before about some of my favorite seed suppliers. They include Baker Creek right here in Petaluma, Johnny’s in Maine, Swallowtail (another great local company) and Renee’s Garden Seeds. I like to order their catalogues each winter and spend some time browsing. I look for reliable varieties that I’ve grown before, ones that they recommend, and new exciting varieties that look promising for one reason or another.
Once you’ve got your seeds ordered, think of each crop you want to grow and when you hope to pop it in the ground. A good rule of thumb for most annual vegetable crops is to give them about 6 – 8 weeks to grow from seed to a good transplant size in the winter, and more like 4–6 weeks in the summer. So If I sow kale seeds on March 1st, they may be ready to plant in the ground around April 21st.
Step 2: Buy or make your seed starting mix
It’s important to find or make a mix that you like and then spend some time observing how it behaves. There are a million different products and recipes out there, and many of them will work for you. They need to include, generally:
- Some organic matter (compost or nutrients)
- Something to provide some aeration and drainage (perlite and vermiculite and common ingredients)
- Some finely granulated material
Before filling your trays with soil mix, you’ll want to make sure all the ingredients are well incorporated throughout the mix, and make sure it’s evenly moist throughout.
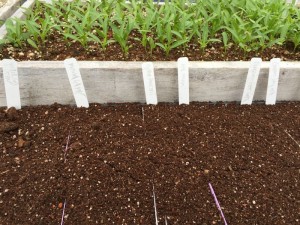
Step 3: Choose your trays
You can start seeds in most anything. The best receptacles will have some drainage holes in the bottom, and will be about 3 – 4″ deep. Six-packs, cell trays, or something else that has dividers to separate the different types of seeds from one another will make your life easier. But a big flat shallow box will work too, just make sure to space the seeds far apart from one another and label well.
Step 4: Fill your trays with soil mix.
This part is not rocket science, but there are a few little tricks to watch out for, especially if it’s your first attempt to start seeds. As I’ve already said, first make sure the soil mix is evenly moist. Then, fill your trays or boxes to the top, and give them a little gentle drop from just a few inches off the table or ground in order to settle any air pockets that are sitting in there (you don’t want your roots growing into air!). You can then smooth the top flat with either your hand or a ruler or stick. If the surface of the tray’s soil isn’t flat, water can gather and algae can grow, and air movement is stalled. It’s always a good idea to start seeds in the best conditions possible.
Step 5: Make small indents in the center of each cell, and place the seeds in there.
First, look at the size of the seeds you’re about to sow. A good rule of thumb is to bury seeds about twice as deep as they are wide. So for many seeds, this will mean that you barely bury them much at all. Once I know the size of the seed I’m about to sow, I make an indent with my finger for each seed I’m about to sow – the depth of the indent corresponding to the size of the seed. You can then cover the seed lightly either by adding a pinch of soil mix on top.
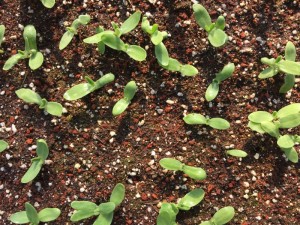
For each plant you want, it’s a good idea to sow a few extra seeds in case they don’t all germinate. This is especially true if you’re using old seed, as viability goes down with each year. If all of the seeds you sow do germinate, it’s not a problem as you can just thin them out later.
Step 6: Water them in!
Gentle, but thorough should be your watering goal when you start seeds. With especially tiny seeds you want to be careful not to wash them away with a harsh spray. Before the seeds germinate, they need to stay pretty moist. This means that you’ll be watering lightly – just to saturate the top ¼ inch of soil or so – a few times a day, or whenever the soil surface visibly shows signs of drying out. As the seeds germinate and grow, you can decrease frequency and increase the depth of your watering – always aiming to soak the area just below your roots in order to coax them towards the moisture.
Step 7: Choose the location for your seed tray
For the home gardener, I think a sunny windowsill is the best location to start seeds. Light and a bit of warmth is important, as is making sure you choose a place that you’ll be sure to walk by a couple of times a day.
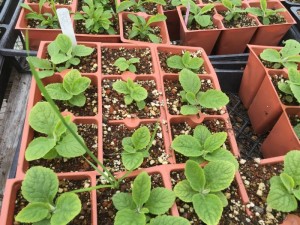
And voila! Watch them grow, make sure they are in a spot with good air circulation, and water them appropriately according to their size and how often they dry down. You’ll know its time to plant them outside when they have a few sets of leaves, and the roots have developed a strong branching system (don’t check for this too often, but after 5 weeks or so you can gently turn the tray over and wiggle a transplant or two out in order to take a look).
This method to start seeds will work for many, many varieties, but there are always exceptions and seeds that require special requirements. Later this season on the blog we’ll cover some of these specific needs – and go more in-depth with a few ways to step up the seed starting game for the tricky ones.
 Family