Growing Garlic at Home
November is a strange month for those of us who work with the land. On our farm this year we aimed to get the old crops out of the field and composted, the ground tilled, and the cover crop sown by November first. But we all know what sometimes happens to the best laid plans.
So even in this push to race against the clock, there’s a light at the end of the tunnel: garlic! We aim to plant ours by Thanksgiving each year. No matter how late we are with the rest of the winter prep work, we’ll be done by then! I think of it as the final step in closing out the farming season, and tuck my garlic into the ground looking ahead to a promising season to follow after some winter rest.
You too, home gardener, should take advantage of this brilliant garlic-planting window. I know there are tons of you out there planning to make better and smarter use of your gardening space next spring. So take that energy and get started on your 2015 garden NOW by planting garlic! There are so many beautiful varieties to choose from, but don’t be overwhelmed, try your luck with any of them.
Growing Garlic in 8 Easy Steps
Step 1: Source your seed! The Petaluma Seed Bank sells great garlic for seed. The advantages of buying garlic from a farm or seed company rather than just using any old garlic you have is the potential disease resistance. Garlic grown for seed is selected to be disease-free. You probably won’t have a problem growing any old garlic you find, but there are options either way. Depending on how much space you have, you probably only need a head or two of garlic.
Step 2: Prep your ground, boxes, or pots. Add a 2 – 4” thick layer of compost, work it into the soil with a digging fork, shovel, or your hands, and rake or brush the soil surface flat.
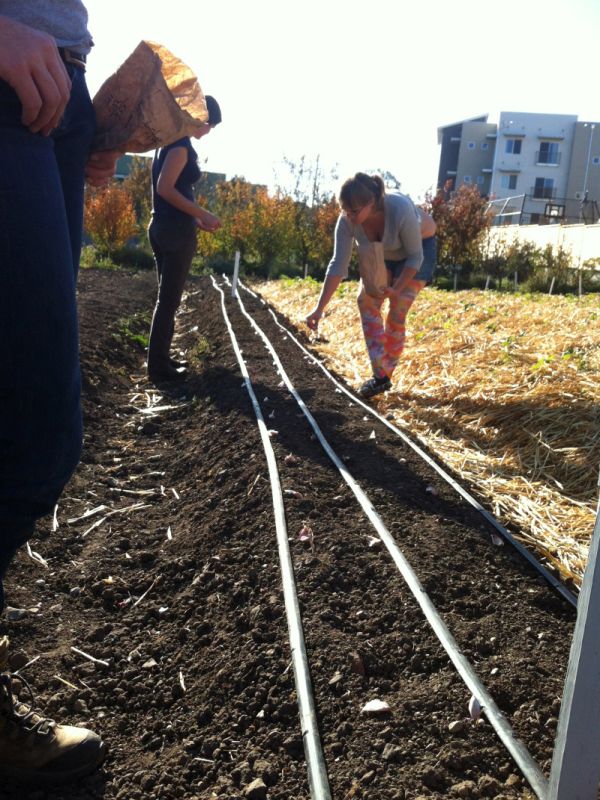
Step 3: Crack your garlic and get planting. All you need to do is break apart the individual cloves, don’t worry about removing any additional papery skins because they will actually help to protect your garlic cloves. You can dig little holes for your garlic or, in most airy soils, poke the cloves right into the soil, pointy end up, about 3 inches deep, leaving about 6 inches of space between each clove.
Step 4: Water. Use a hose or whatever irrigation system you’re working with to really wet up the soil down to the depth of the garlic, but don’t soak it too much. Come back and water every couple of days or whenever the soil dries down under the surface. Be careful to not over water the garlic, especially before it sprouts, or it can rot. Once the garlic leaves begin to die back in spring cut off water all together to let the garlic firm up.
Step 5: Mulch! Garlic has shallow and fairly inefficient roots, which makes it all the more important for you to keep the bed weed-free. Laying a thick layer of mulch of either straw or leaves will greatly help with weed suppression. Don’t forget to come back and weed on a regular basis.
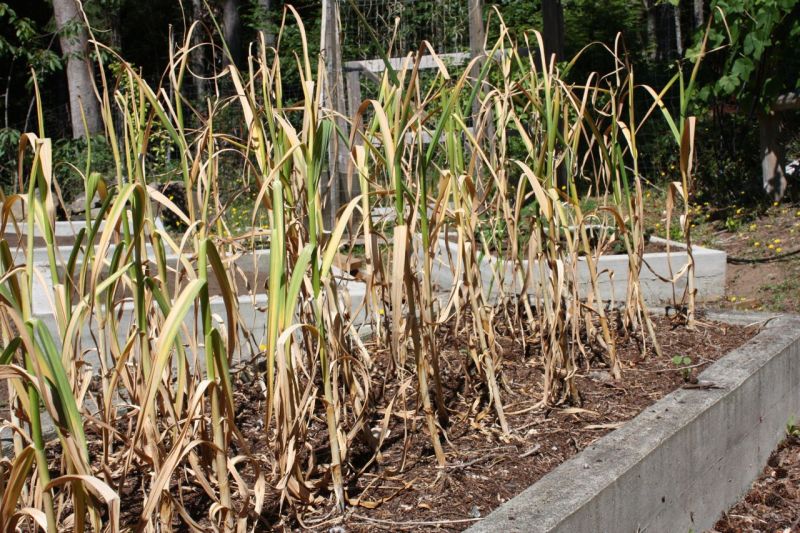
Step 6: Watch it your growing garlic! Your seed should sprout up and through the mulch within a few weeks, and continue to grow slowly throughout the winter. Once warmer spring weather hits, growth will accelerate.
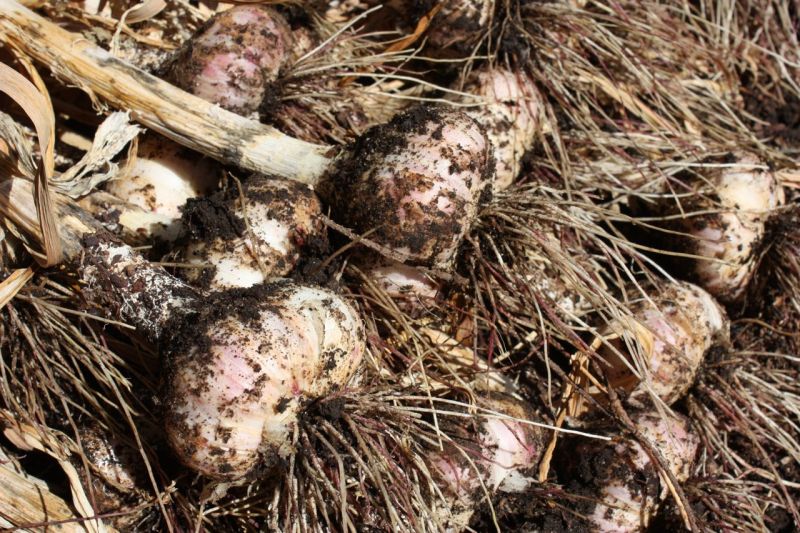
Step 7: Harvest your garlic! You’ll know it’s time to harvest because the leaves will have seriously browned. This should be around June or July. Once about one half of the leaves are browned and dead looking, you can harvest. If growing garlic in the ground, be sure to carefully dig it up with a fork or spade.
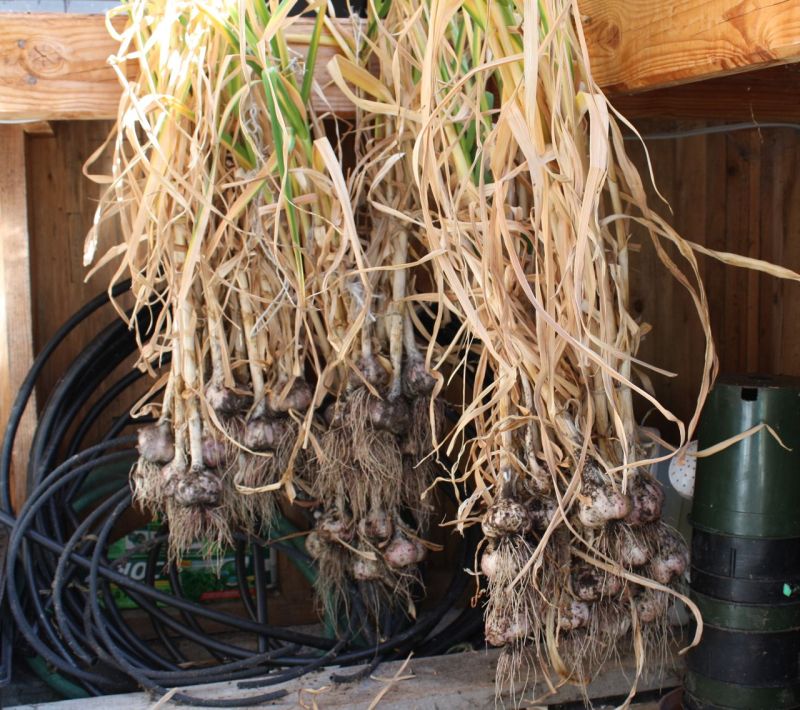
Step 8: Cure it. Hang or place garlic in a cool, dark, airy place for a few weeks to a month, leaving the dried leaves on to continue sucking moisture out of the heads. When the garlic is done curing cut those stems back to just about an inch. Then, enjoy!
There’s nothing better than spicy, home-grown garlic, so go plant some! Next week on the blog I’ll be talking about compost – the what’s, why’s, and especially, the how’s.
 Family